Most people learn one screenshot shortcut on their MacBook and never look further. That works fine, until it doesn’t. You go to grab a part of the screen and you’re stuck with a full-screen dump. You need to share something quickly and you end up attaching a file when pasting would have been faster. Or you’re trying to capture a full webpage and the built-in tools just don’t cut it.
The good news: macOS has a surprisingly solid set of screenshot tools. The three methods below cover the vast majority of real-world situations, whether you’re on a MacBook Air, a MacBook Pro, or something in between. Once you know all three, you’ll know which one to reach for without even thinking about it.
If you’re also hunting for the right Mac to take all these screenshots on, our MacBook reviews and benchmarks might be a useful next stop.

Method 1: Keyboard Shortcuts (The Fastest Way)
This is where most people start, and honestly, it covers about 80% of what you’ll ever need. There are three main shortcuts to know.
Shift + Command + 3 — Capture Your Entire Screen
Press these three keys together and your MacBook grabs everything visible on screen right now. You’ll hear a shutter click, and a small thumbnail pops up in the bottom-right corner for a few seconds.
By default, the screenshot saves to your desktop as a PNG with the date and time in the filename. If you click the thumbnail before it disappears, you can annotate or crop it before it saves. If you ignore it, it saves on its own. Simple.
One thing worth knowing: if you have multiple displays connected, this shortcut captures all of them as separate files. That surprised me the first time it happened. More on managing save locations in the Mac fixes and optimization section of the site.
Shift + Command + 4 — Capture a Selected Area
This one turns your cursor into a crosshair. Click and drag over the area you want to capture, then release. The screenshot saves immediately.
There are a couple of tricks that make this much more useful. While you’re dragging your selection, hold the Spacebar to move the entire selection box without resizing it. That’s helpful when you’ve framed the area almost right but need to nudge it over. And if you change your mind entirely, just hit Escape to cancel before releasing.
This is the one I reach for most often. It’s precise, fast, and doesn’t require any app to open.
Shift + Command + 4, then Spacebar — Capture a Single Window
Here’s a lesser-known variation. Press Shift + Command + 4, and then immediately tap the Spacebar. Your cursor turns into a camera icon instead of a crosshair. Now hover over any window, and it highlights in blue. Click it and that window gets captured cleanly, drop shadow and all.
If you don’t want the shadow, hold Option when you click. This works identically on MacBook Air and MacBook Pro.
One Bonus Trick: Copy to Clipboard Instead of Saving
Add the Control key to any of the shortcuts above and the screenshot goes straight to your clipboard instead of saving as a file. So Control + Shift + Command + 3 for the full screen, or Control + Shift + Command + 4 for a selection.
This is genuinely useful. Paste directly into Slack, an email, a Google Doc, or anywhere else without a file ever touching your desktop. For fast, informal sharing, this is the move. It ties directly into a broader productivity workflow that keeps your desktop from turning into a screenshot graveyard.
Method 2: The Screenshot App (Shift + Command + 5)
Added in macOS Mojave and available on every Mac since, the Screenshot app is the built-in control panel for screen capture. It doesn’t replace the shortcuts, but it adds a few things they can’t do.
What the Screenshot App Actually Gives You
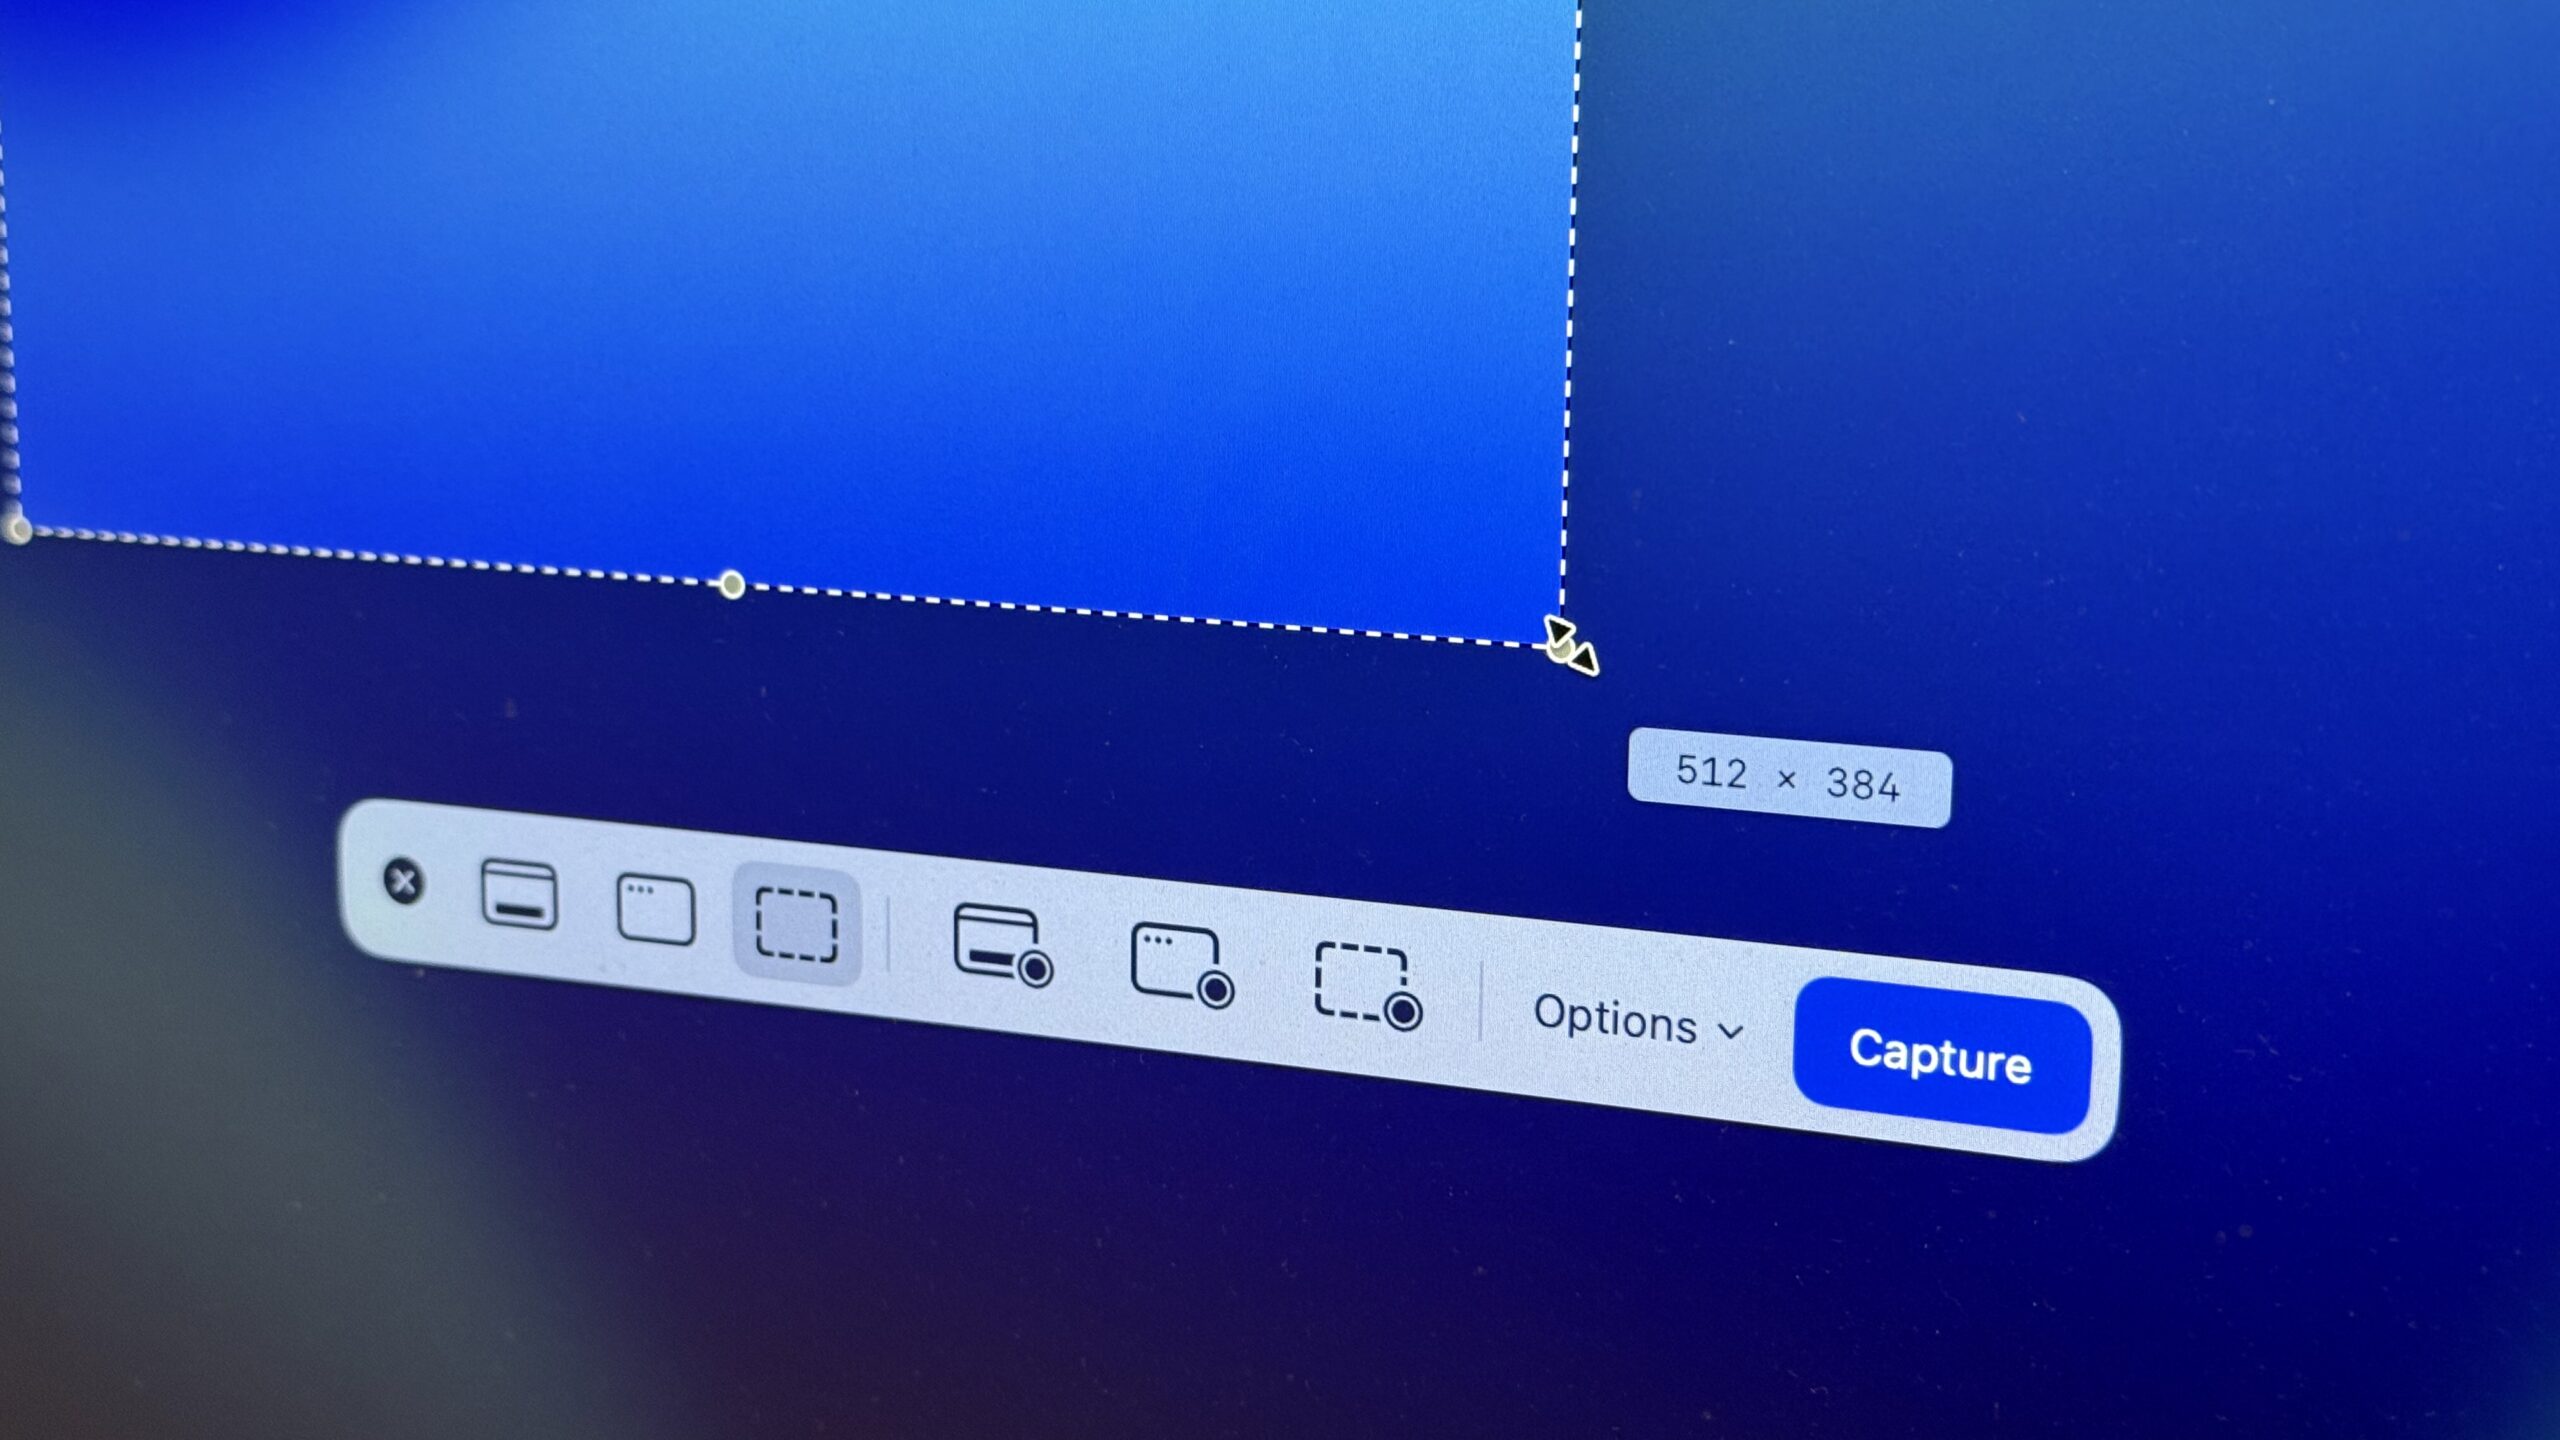
Press Shift + Command + 5 and a small toolbar appears at the bottom of your screen. From here you can capture the full screen, a selected window, or a portion of the screen. You can also start a screen recording of either the full display or a selected area.
The feature most people overlook is the timer. Under Options, you can set a 5 or 10-second delay before the capture fires. That’s useful when you need to screenshot a menu or a dropdown that disappears the moment you try to interact with anything else. It’s also the easiest way to capture a state that requires your hands on the keyboard or trackpad.
The Screenshot app also lets you turn the floating thumbnail on or off, and choose whether the mouse cursor shows up in the image. Small things, but they matter when you’re creating documentation or tutorials.
How to Change Where Your Screenshots Save
By default, screenshots land on your desktop. That gets messy fast. In the Screenshot app’s Options menu, you can point saves anywhere: a specific folder, Documents, the clipboard, or even straight into Mail or Messages. Pick a dedicated Screenshots folder and you’ll spend a lot less time hunting for files. Macworld’s guide on changing the save location walks through this in detail if you want the full picture.
Once you set it, it sticks. You don’t need to change it every time.
How Do You Take a Scrolling Screenshot on a MacBook?
This is the question that comes up once people have the basics down. You want to capture an entire webpage, a long document, something that doesn’t fit in a single screen. And here’s the honest answer: macOS doesn’t have a native scrolling screenshot button. The built-in tools stop at what’s visible. But there are practical ways around it depending on which browser you use.
The Built-In Way: Safari’s Web Inspector
Safari has a hidden full-page capture hidden inside its developer tools. First, enable it: go to Safari > Settings > Advanced and check “Show features for web developers”. That adds a Develop menu to your menu bar. Load the page you want, then go to Develop > Show Web Inspector. In the Elements tab, right-click the line that starts with “html” and choose Capture Screenshot. How-To Geek’s breakdown of the Safari method is a good reference if you run into trouble.
It works, but it’s a bit fiddly. The resulting image can also be large and uncompressed. For occasional use it’s fine, but if you need this regularly, there’s a smoother option.
The Easier Way: Firefox or Chrome
Firefox is the simplest. Right-click anywhere on the page and choose Take a Screenshot. A small overlay appears with two options: save the visible area or save the full page. Click Save full page. That’s it. No developer tools, no extensions, no extra steps.
Chrome requires one more step but is still clean. Press Command + Option + I to open DevTools, then Command + Shift + P to open the command palette. Type “capture full size screenshot” and hit Enter. Chrome saves a full-length PNG straight to your Downloads folder. Zight’s comparison of all browser methods is worth reading if you want to understand the tradeoffs between them.
When to Use a Third-Party App
If you need scrolling screenshots outside of a browser, something like CleanShot X is worth looking at. It can capture long PDFs, spreadsheets, Notion docs, or any app window that scrolls. It’s paid software, but if this is a regular part of your workflow, it saves a lot of time. Check our software comparisons page for more on screenshot tools that go beyond the built-in options.
Where Do Screenshots Go on a MacBook?
By default, every screenshot saves to your desktop as a PNG. The filename includes the date and time, something like “Screenshot 2025-04-09 at 10.45.22.png”. If you take a lot of them, your desktop fills up fast.
If you can’t find a screenshot you just took, open the Screenshot app with Shift + Command + 5, click Options, and check what’s listed under “Save To”. That tells you exactly where they’re going. You can also search for them in Spotlight by typing “screenshot” and looking under Images.
To change the save location going forward, just select a different folder from that same Options menu. A dedicated Screenshots folder in your Documents or Pictures is cleaner than letting them pile up on the desktop.
Does Any of This Work Differently on MacBook Air vs. MacBook Pro?
For the most part, no. The keyboard shortcuts are identical. The Screenshot app works the same way. The scrolling screenshot workarounds are browser-based, so they don’t care which MacBook you’re on.
The one difference is the Touch Bar, which some older MacBook Pro models have. If you’re on one of those, Shift + Command + 6 captures whatever’s showing on the Touch Bar as a separate image. Newer MacBook Pros dropped the Touch Bar entirely, so this is mostly relevant if you’re on a 2016-2021 model.
That’s genuinely the only meaningful difference in the screenshot experience between the two lines.
A Few Habits That Make Screenshots Less Annoying
Once the shortcuts are second nature, a few small habits make the whole workflow cleaner.
- Rename before sharing. The default filename is just a timestamp. Takes two seconds to rename and makes it much easier to find later.
- Use the timer for disappearing menus. The 5-second delay in the Screenshot app is the only reliable way to capture a dropdown or context menu without it closing the moment you lift your hand.
- Add Control for clipboard copies. If you’re pasting into a chat or doc, skip the file entirely. Control + Shift + Command + 4 is the fastest way to grab a selection and paste it directly.
- Set a dedicated screenshots folder. Change the default save location once and forget about it. A folder called Screenshots in your Pictures or Documents keeps things tidy.
Wrapping Up
Taking a screenshot on a MacBook is one of those things that looks simple but has more depth than most people realize. The three keyboard shortcuts handle fast, everyday captures. The Screenshot app adds the timer and save-location control you’ll eventually need. And for scrolling screenshots, Firefox’s built-in tool or Chrome’s DevTools get the job done without installing anything extra.
Start with Shift + Command + 3 and Shift + Command + 4. Get comfortable with those. Then explore the Screenshot app when you need more control. The rest follows naturally.
Want more practical Mac tips and honest tech guides? Sign up for the TheByteLab newsletter and we’ll send the good stuff straight to your inbox, no noise.


One Response
nbkt51